Sunday, November 20, 2011

Quail Eggs


Quail Eggs

I love to try new things - especially when it comes to food.  When I found a petite package of quail eggs at the market in Santa Barbara I could not resist buying them.  Quail eggs are truly beautiful to look at.  Each egg is different with distinct pearly brown markings.  The inside of the egg shell is tinted a delicate blue color.  Quail eggs are SMALL. Though you cannot tell it from the picture they are actually no larger than the end of my thumb.  I made 5 quail eggs for breakfast this morning.  The five eggs together were about the same size as one large chicken egg.  I found the flavor of quail eggs rich and delicious.  What I like about eating quail eggs is that you get a bit of yolk in every bite.  

I think quail eggs would be amazing in a bento box lunch!

Thursday, November 10, 2011

Thai Green Curry


A Recipe From Brett

Yes!  Brett cooks!  The recipe he shared with me is delicious and versatile.

Coconut Thai Green Curry

1 onion chopped
2 T. coconut oil
1 - 2 c. cubed chicken - already cooked
1 - 2 c. veggies - carrots, zucchini, peas, cauliflower or green beans
1 can coconut milk
1/2 c. chicken broth
2 T. asian fish sauce
2 T. green curry paste
sea salt to taste
fresh basil and cilantro

Saute onion in coconut oil until soft and tender.  Add cubed chicken and saute for 2 minutes.  Add veggies, coconut milk, chicken broth, asian fish sauce, and green curry paste.  Bring to a boil, reduce heat, cover, and simmer gently for about 15 to 20 minutes or until the vegetables are tender. Adjust seasoning and add sea salt to taste.  Serve as a delicious soup and garnish with fresh basil or cilantro.  If you don't have fresh basil - the dried seasoning is good.

Brett

Saturday, October 29, 2011

Edible Adventures Update


Carrisa

Initially this blog was inspired by my daughter Carrisa and the powerful decision she made to change her health destiny through dietary change. I wanted to record and commemorate our journey together and the time we spent in the kitchen, garden, and farmer's markets during the summer of 2010.  During that memorable summer we posted photos of some of our favorite kitchen adventures and included many recipes.  Edible Adventures became a scrapbook of our summer fun together.

Now that Carrisa is away at school our kitchen collaboration is not as easy and takes place long distance.  Those frenzied summer months that we spent in the kitchen together have given way to recipes shared over the telephone or e-mailed to each other.

We are both dedicated to seeking out the very best food that we can, favoring what is locally available and in season, and preparing our food with loving attention.

Carrisa continues to cook up delicious whole food meals for herself while maintaining a busy work and school schedule.  She tells me that she does a lot of her cooking on the weekend.

I continue to shop at farmer's markets and spend enormous amounts of time in the kitchen.   I am currently perfecting and refining recipes that will eventually go into a cookbook.  Because I am a cook that does not always follow a recipe and often feels inclined to create the "dish of the moment" I am learning to discipline myself and take more careful measurements of the food that I cook.

Monday, October 3, 2011

Carrisa's Shortbread

THE STORY OF SHORTBREAD

The origin of shortbread dates back to Scotland in medieval times.  Traditionally, shortbread was baked in a large round and served cut into triangles or wedges.

The traditional shortbread recipe is one part sugar, two parts butter, and three parts flour.  The flour that was used to make traditional shortbread was fine oatmeal which is a staple food in Scotland.  Today the commercial versions of shortbread contain wheat flour or even corn and rice flour.

CARRISA'S TRADITIONAL SHORTBREAD

2 scant cups of fine oat flour
1/4 c. butter, cool, but not refrigerated
1/4 c.  sugar
Optional:  rose water for the butter's final rinse

Mix the flour and sugar on a work surface, then dot with pieces of cool butter.  With your fingertips, incorporate the mixture until it resembles bread crumbs.  Then using the palm of your hand, spread out the dough, forcing the flour to bind with the dough.  Gather and repeat three to four times, until you can form a ball of dough.  If the dough remains unworkable and crumbly, sprinkle with 1 - 2 t. of water, and knead again.  Shape into a ball and let rest for 30 minutes in a cool place (think of an unheated Scottish farmhouse.) 

Preheat oven to 250 degrees.  On a floured surface, flatten the dough into a disk about a finger thick, and mark off 8 wedges with the tines of a fork pressed clear through the dough.  You can also add decorations with your fork, if you like.  Bake on an un-greased cookie sheet for an hour.  The shortbread should not brown.  When done, remove from oven, cool on a wire rack, break into wedges, and serve with tea.

Sunday, July 3, 2011

Lacto-fermented Sauerkraut


 Homemade Sauerkraut

I have been experimenting with making homemade sauerkraut for about seven years now, often with less than satisfactory results.  After years of cycling between the convenience of buying expensive jars of sauerkraut at the market and the frustration of trying to save money and make my own I finally found a recipe that hits the mark.

I discovered the recipe in Sally Fallon's wonderful cookbook "Nourishing Traditions."  I was so thrilled with the results of my first jar of sauerkraut that I now prefer homemade sauerkraut to my former favorite store bought variety.  Every time I see a 14-oz jar of sauerkraut selling for for $9.00 to $14.00 I am glad I know how to make my own.

SAUERKRAUT RECIPE - makes 1 quart

1 medium cabbage, cored and shredded
1 T. caraway seed
1 T. sea salt
4 T. whey

In a bowl, mix cabbage with caraway seeds, sea salt and whey.   Pound with a wooden pounder for about 10 minutes to release juices.  Place in a quart-sized, wide-mouth Mason jar and press down firmly with the pounder until the juices come to the top of the cabbage.  The top of the cabbage should be submerged at least 1-inch below the top of the jar. Cover tightly and keep at room temperature for about 3 days.  Transfer jars to cold storage or the refrigerator.  Flavor improves with age.

Saturday, June 18, 2011

Carrisa One Year Later


June 2011

Hi Everybody.  Here is a a picture of Carrisa and I on a recent visit - one year later.  Carrisa has been eating whole unprocessed foods for one year.  She has been following the principles of the Weston A. Price Foundation as explained by Sally Fallon in her book "Nourishing Traditions" for one year.  Carrisa shops local, buys organic, and cooks her own food while she works and goes to college.  Cooking her own food is not always an easy or convenient thing to do - but it certainly is worth the extra effort.   Carrisa has lost 50 pounds and has not deprived herself or dieted for one day.

Carrisa is a success story and I am very proud of her.

Tuesday, May 24, 2011

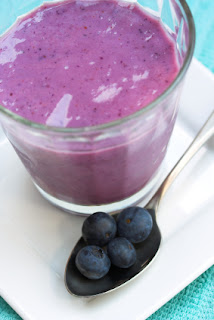
Blueberry Superfood Smoothie


Lately I have been making a superfood smoothie in the morning for breakfast.

LISA'S SUPERFOOD SMOOTHIE

1 c. raw milk kefir
1/2 c. filtered water
1/2 c. wild blueberries frozen
1 egg yolk
2 scoops of your favorite green powder
1 t. maca
1 small sliver of fresh ginger
stevia to taste

I put all of the ingredients in my Vita-Mix and blend until smooth.  It tastes super good.

Tuesday, May 17, 2011

Carrisa's Chunky Veggie Pasta Sauce


Carrisa's Chunky Veggie Pasta

This recipe and photo just arrived from Carrisa in Salt Lake City.  The recipe is loaded with tomatoes.  So all of you tomato lovers out there - go for it!   Those of you that are looking for a vegetarian pasta dish can omit the ground beef.  Thank you Carrisa for sharing this yummy recipe with us!

CARRISA'S CHUNKY VEGGIE PASTA

2 T. butter
2 T. olive oil
1 large yellow onion, chopped
2 cloves garlic, smashed
1 lb ground beef -optional
2-4 c. water (just to cover)
1 large 28 oz. can peeled tomatoes, cut into chunks (add juice)
1 small 6 oz. can tomato paste
2 T. balsamic vinegar
1 red bell pepper, diced really small
2 carrots cut into quarters and sliced
3 small zucchini cut into quarters and sliced
dash of crushed red pepper
sea salt and pepper to taste

In a ceramic cast iron pan saute onion and garlic in butter and olive oil over a medium heat.  Add 1 lb. of ground beef and continue cooking until the meat is done.  Add remaining ingredients.  Bring to boil, reduce heat, cover, and simmer until carrots and zucchini are tender.

Carrisa serves her chunky veggie sauce over brown rice pasta.

Sunday, May 15, 2011

Crock Pot Beef Stew


Beef Stew

On a blustery spring day what could be better than a slow-cooked beef stew simmering in the crock pot.

CROCK POT BEEF STEW

Bacon fat or lard
Arrowroot powder
Sea salt
3 lbs. grass-fed stew meat
1 onion sliced
2 c. Tomato Sauce or Mock Tomato Sauce
a splash of organic red wine
Freshly snipped thyme
8 carrots cut into chunks
1 rutabaga cut into cubes

Bacon fat is nice for browning chunks of beef.  It doesn't smoke, it doesn't scorch, and it remains stable at high temperatures.

Put arrowroot powder with a bit of sea salt in a zip lock bag and coat beef chunks.  Place beef chunks, a few at a time, in the pan of hot bacon fat and sear the meat.  Searing the meat helps keep it moist and juicy.

Put the browned meat, sliced onion and tomato sauce in a large crock pot with about 1- 2 c.  water or stock.  (The amount of liquid depends on how thick you want the stew to be) Deglaze the pan with a splash or two of red wine and scrape into the crock pot.  Add fresh snipped thyme or dried thyme.  Set the crock pot on a low setting and let the it cook for 2 - 3 hours.

After it has simmered for 2 - 3 hours add carrot and rutabaga chunks and simmer for 1 to 2 more hours.

NOTE ON TOMATOES

While I eschew tomatoes of all kinds out of season, (I think Styrofoam might taste better), I do enjoy fresh tomatoes when they are in season, especially homegrown heirloom varieties.  Those who are sensitive to tomato sauce, like I am, will want to keep a few jars of mock tomato sauce handy.  Mock tomato sauce is a velvety blend of winter squash, onion, carrot, celery, and beet root.  Mock tomato sauce makes an excellent substitute for tomato sauce and I use it in a variety of soups, stews, enchiladas, and pasta dishes.  I particularly like it in lentil soup.  One of these days I should get around to posting how to make mock tomato sauce.

Sunday, May 1, 2011

Sourdough Buckwheat Pancakes


Sourdough Buckwheat Pancakes

Carrisa and I developed this recipe for delicious sourdough buckwheat pancakes this summer while we were together. Buckwheat pancakes are our favorite weekend breakfast food.  I always make a big batch and freeze the left-overs by wrapping them in parchment paper and placing them in a freezer zip-lock bag.  When I am ready to use them I put the pancakes on a steamer rack and warm them over the stove for an instant mid-week breakfast treat.

Although I have tried many versions of buckwheat pancakes over the years - this recipe is our favorite.

SOURDOUGH BUCKWHEAT PANCAKES

2 c. buckwheat grouts
1 c. oatmeal (I use gluten free)
yoghurt mixed with warm water to make 3 c.
8 egg whites, beaten until stiff peaks form
a good pinch of sea salt
4 whole eggs

The day before you plan to make pancakes grind the buckwheat grouts and oats in a coffee grinder or seed mill into a fine flour.  Mix the freshly ground flour with a yoghurt and warm water mixture.  Stir well.  Cover and set in a warm place for 12 - 24 hours.

In the morning beat the egg whites with a few pinches of sea salt until stiff peaks form.  Fold egg whites into the flour mixture.  Beat 4 whole eggs and stir into the flour mixture.

Cook the pancakes, (1/3 c. of batter for one pancake), on a buttered cast iron skillet or pancake griddle over a medium heat.

Top with your favorite topping.  I experiment with different toppings.  Right now I like coconut butter which is a blend of coconut oil and coconut solids.  It is smooth, creamy, and slightly sweet.  I also like pecan butter or regular grass-fed raw butter on my pancakes.

Friday, April 29, 2011

Royal Wedding Sweets


Buttermilk Scones with Clotted Cream and Strawberry Jam

Carrisa phoned to give me a heads up on her Royal Wedding plans.  She made delicious looking buttermilk scones, homemade clotted cream and strawberry jam.  She served these with a delicious brunch of scrambled eggs, bacon, and a fresh organic fruit salad.

The recipe Carrisa used today is an adaptation of buttermilk biscuits from Sally Fallon's cookbook "Nourishing Traditions."  In case you are wondering Carrisa and I sprout or sour our grains to neutralize enzyme-inhibitors and anti-nutrient factors.  The soured and sprouted grains makes the nutrients in the grain more bio-available and it is because allergies and sensitivities to grains are becoming increasingly widespread.  People who are sensitive to grains often tolerate them better when they have been soaked, sprouted or fermented.  Grains prepared this way are beneficial for everybody - whether you think you are sensitive to grains or not - because they are easier to digest and more nutritious.

Buttermilk Scones

3 1/2 c. freshly ground spelt, kamut or whole wheat flour
1 c. buttermilk
4 T. melted butter
2 T. rapadura sugar
1 1/2 t. sea salt
2 t. baking soda
unbleached white flour

Mix the flour with buttermilk to form a thick dough.  Cover and leave in a warm place for 12 - 24 hours. Carrisa started her dough yesterday.  Place the dough in a food processor and process for several minutes to knead it.  Blend in the remaining ingredients.  Remove the dough and place on a well-floured pastry cloth or board and sprinkle with unbleached white flour to prevent any sticking.  Cut into biscuits with a glass and place on a buttered baking sheet.  Bake at 350 degrees for about 40 minutes.  Carrisa said that she found that 25 minutes was more like it.  So be sure to check frequently so that you don't over bake them.

Devonshire Cream (Clotted Cream)

Makes about 1 1/2 c.

5 - 6 oz. organic cream cheese
1 c. whipping cream
1 t. pure vanilla extract
2 T. sweetener
zest of lemon

If using cream cheese make certain it is room temperature.  Place all ingredients in a large bowl and beat until the mixture holds its shape and looks like softly whipped cream.  Use right away or cover and refrigerate until serving time.

Wednesday, April 27, 2011

How To Make Delicious Raw Pecan Butter


Homemade Pecan Butter

When I visited Carrisa last October she gave me a spoonful of her homemade peanut butter.  I could not believe how rich and delicious it was!  It tastes so much better than commercial brands that I have been making homemade nut butter ever since.

Pecan butter is my current favorite.  I slather it on sourdough buckwheat pancakes, toasted sourdough bread, apple slices, and celery.  I also use pecan butter to make a healthy energy snack called "Earth Balls."

My recipe for pecan butter is inspired by a recipe found in Sally Fallon's "Nourishing Traditions."  

RECIPE FOR PECAN BUTTER

2 c. crispy nuts (recipe to follow)
3/4 c. coconut oil
1 T. raw honey
1 t. sea salt

Place nuts and sea salt in a food processor and grind into a fine powder.  Then add the coconut oil and the honey and process until the nut butter becomes smooth.  It will be in a liquid like state but it will harden up when it is chilled in the refrigerator.  Pour the nut butter liquid into an airtight container and store it in the refrigerator.

Almonds, peanuts, and cashews make good nut butter.

CRISPY NUTS

4 c. pecans or almonds or cashews or peanuts
2 t. sea salt (1 T. for almonds, cashews, or peanuts)
filtered water

Mix pecans, salt, and water in a large glass bowl and let sit in a warm place for 7 - 12 hours.  Drain in a colander.  Dehydrate for about 24 hours or until completely dry and crisp.  Store in an airtight container.

For those that do not have a dehydrator you can spread the pecans on a baking sheet and place in a warm oven at no more than 150 degrees for 12 - 24 hours.  If you use the oven remember to turn the nuts occasionally.

Sunday, March 20, 2011

Beet Kvass - Spring Tonic


Jar Of Beet Kvass

While the rain comes down outside I will be in the kitchen making beet kvass.  Beet kvass is a healthful probiotic beverage made with whey. Check out the luscious vibrant color. Beet kvass strengthens the digestion when 4-oz. are taken in the morning and in the evening.  In addition, Beet kvass alkalizes the blood, cleanses the liver, and is a good treatment for kidney stones.

Can lacto-fermented beet kvass offer protection from the effects of radiation?

Dr. Thomas Cowan who wrote "The Fourfold Path To Healing" has this to say about foods that protect us from radiation.

"Special foods that have been shown to counteract radiation sickness include naturally fermented miso, beets, kombucha and sea vegetables, such as kombu." 

My recipe for beet kvass comes from Sally Fallon's cookbook "Nourishing Traditions."

RECIPE FOR BEET KVASS

3 medium beets, peeled and chopped into cubes
1/4 c. whey
1 T. celtic salt
filtered water

Sterilize a 2-quart glass jar with boiling water.  Boil the lid too.  Place beets, whey and salt in the glass jar.  Add filtered water to fill the container.  Stir it well with a chop stick.  Cover securely.  Keep it at room temperature on the kitchen counter for 2 days before transferring to the refrigerator.

When most of the liquid has been drunk, you may re-fill the glass jar with water and keep at room temperature for another 2 days.  The second brew will be slightly less strong than the first.  After the second brew, discard the beets and start again with a fresh batch.

Wednesday, February 23, 2011

Winter Root - Cold Weather Soup

Winter Root Soup
I have had my eye on this recipe from Sally Fallon's cookbook "Nourishing Traditions" and have wanted to make it for quite some time. Guess what?  Carrisa beat me to it. She phoned this morning to tell me how delicious it is.  Carrisa took soup to Charlotte, who is convalescing from surgery, and Charlotte likes it too.

RECIPE FOR WINTER ROOT SOUP

3 medium onion, peeled and chopped
2 leeks, washed, trimmed and sliced
4 carrots, peeled and sliced
2 turnips, peeled and sliced
1 rutabaga, peeled and sliced
2 parsnips, peeled and sliced
4 T. butter
1 1/2 qt. chicken stock
several sprigs of thyme tied together
4 cloves garlic, peeled and mashed
pinch cayenne pepper
pinch nutmeg
sea salt to taste
sour cream or creme fraiche

Melt butter in large pot and add onions, leeks, carrots, turnips, rutabaga, and parsnips.  Cover and cook gently about 1/2 hour over low heat, stirring occasionally.  Add stock, bring to a boil and skim.  Add garlic, thyme, and cayenne.  Simmer, covered, for about 1/2 hour until veggies are soft.

Remove thyme and puree soup.  Season to taste.  If soup is too thick, thin it with water.  Serve with a spoonful of cultured cream.

Wednesday, February 16, 2011

Whole Foods Diet - Before and After

Before - May 2010

After - January 2011


I am an advocate of the Weston A. Price Foundation and its dietary guidelines.  I put the diet to the test this summer.  My daughter Carrisa, who wanted to learn how to prepare healthier food, came to stay with me during her break from college.  We had a glorious summer together.  It was like being in a cooking school every day.  We hiked together early in the morning.  We gardened and grew our own organic vegetables, we shopped at local farmer's markets, and we cooked THE MOST AMAZING FOOD.  We made it a point to never deprive ourselves, in the dietary sense of the word, and made delicious, nutrient-dense food our daily fare.

Kudos To Carrisa

I have to give credit to Carrisa.  No matter how wonderful the WAPF dietary guidelines are, no matter how much cooking Mom was willing to do, it would not have made a difference if Carrisa had not been 100% committed to making a change.

Carrisa is back in school now and she has been amazingly consistent in choosing the highest quality nutrient-dense food that she can find. Carrisa does not compromise.  Even while she maintains a busy work and school schedule she still manages to find time to prepare her own meals. She is an inspiration to me and I believe that the good results that she has experienced speak for themselves.

You can check out the dietary guidelines for the Weston A. Price Foundation in my September 3, 2010 post.

Saturday, February 5, 2011

Brett's Squash Soup

Brett's Favorite Squash Soup

2 T. olive oil
1 medium butternut squash, peeled and cubed
2 carrots, diced
3 parsnips, diced
1 small onion, sliced
6 c. chicken stock
1 bay leaf
6 sprigs fresh thyme
1/2 t. coriander
2 T. rice vinegar
salt and pepper to taste

Saute vegetables in oil for 5 minutes.  Add stock and bay leaf and bring to a boil.  Reduce heat, cover, and simmer for about 20 - 25 minutes.  Add seasonings and vinegar and when sufficiently cool puree in small batches.

This soup is a winter favorite in our family.

Thursday, February 3, 2011

Edible Flowers

Calendula begins to bloom in our garden in late winter.

Calendula

Some of my favorite edible flowers are anise hyssop, arugula, basil, borage, calendula, chive blossoms, dandelion, dill, johnny-jump-up, lavender, mint, nasturtium, pansy, pea, rose, rosemary, and thyme blossoms.  These flowers add beauty and flavor to spring and summer salads.

I grow all of these flowers in grow boxes and pots.  Some of the herbs are known as perennials and they become permanent garden residents.  Some of the flowers are called annuals - but they are often so hardy that they will  re-seed themselves.  When an annual plant re-seeds itself -  it is an indication that the plant particularly thrives in the location you have planted it.

I seldom plant my garden in neat and tidy rows.  So it is a joy for me to see plants re-seed themselves and return again.  They often spread themselves out and mingle together luxuriously creating beautiful and surprising tapestries of color.  I like surprises and I find these mixed beds much more pleasing than a contrived and organized garden bed.

Wednesday, February 2, 2011

Quinoa With Dried Cranberries

Quinoa Salad With Dried Cranberries

1 c. quinoa, rinsed well
1/4 c. lemon juice
2 T. olive oil
2 thinly sliced green onions
1/2 c. minced parsley
1/3c. dried cranberries
1/3 c. toasted pumpkin seeds
1 t. sea salt

Bring 2 c. water to boil in a saucepan.  Add rinsed quinoa and 1 t. sea salt.  Reduce heat, cover, and simmer for about 30 minutes or until the quinoa is done.  Set aside to cool slightly.

While the quinoa cooks whisk together lemon juice and olive oil in a shallow bowl.  Add onion, parsley, cranberries, and pumpkin seeds.  When quinoa is sufficiently cool fold it into the mixture and stir to blend.  Adjust salt and add pepper if desired.

Tuesday, February 1, 2011

Carrisa's Beef Stew

Beef Stew

CARRISA'S BEEF AND MUSHROOM STEW

1 chuck roast, cut into 1 - 2 inch cubes
3 spoonfuls of arrowroot powder
4 - 6 slices of bacon, cut into 1-inch cubes
4 c. beef stock
1 large onion, diced
5 cloves garlic, minced
dash of oregano
2 bay leaves
1 6-oz can of tomato paste
2 carrots, cut into chunks
6 golden Yukon potatoes, peeled and cut into quarters
8 oz. mushrooms, sliced
1/2 bunch parsley, minced
butter
salt and pepper to taste

Put arrowroot with a dash of salt and pepper in a zip-lock bag.  Add cubed beef and shake until the beef is thoroughly coated.

In an enameled cast-iron pot cook bacon pieces over a medium low flame until cooked.  Set aside on a paper towel to drain.  Add a slice of butter to the pan drippings and turn up the heat up to medium.  Brown the beef and set aside on a plate.

Add 1/2 c. beef stock and deglaze the pan.  Add the browned beef, bacon, remaining beef stock, onion, garlic, tomato paste, oregano and bay leaf.  Bring to a boil, reduce heat, cover and simmer until the meat is tender or about 1 hour.  Add carrot and potato and simmer for an additional 1/2 hour - hour.

While the vegetables are cooking saute the mushrooms in a saucepan in butter until tender. 

When the stew is ready stir in the sauteed mushrooms and minced parsley.  Add salt and pepper to taste.


Wednesday, January 26, 2011

Roast Duck

Roast Duck

When I make roast duck I follow Julia Child's recipe in "Mastering The Art Of French Cooking."

The secret of making delicious duck is to not over cook it.

ROAST DUCK

1 5 1/2 lb. duckling
1/2 t. sea salt
1/8 t. pepper
a pinch of thyme
1 small sliced onion
1 medium slice carrot
1 medium sliced onion
Shallow roasting pan

Preheat oven to 425 degrees.

Season the inside of the duck with sea salt, pepper, herbs and sliced onion.  Secure the legs, wings, and neck skin to the body.  I use twine.  Prick the skin around the thighs, back, and lower breast.  Dry the duck thoroughly with a paper towel.

Place the duck breast up in the roasting pan and strew the carrot and onion around it.  Set the pan in the middle level of the oven for 15 minutes to brown slightly.

Reduce the heat to 350 degree and turn the duck on its side.  Remove accumulated fat occasionally with a bulb baster.  Basting a duck is not necessary.

About 20 minutes later turn the duck to its other side.

15 minutes later salt the duck and turn it breast up.

The duck is done to medium rare if the juices from the fattest part of the thigh or drumstick run faintly rosy when the meat is pricked.  The duck is well done when the juices run pale yellow.

When done, discard trussing strings and place the duck on a platter.

SAUCE FOR DUCK

To make a sauce spoon out all but 1 Tablespoon of fat.  Add 1 - 2 c. of stock and boil rapidly scraping up roasting juices and crushing the vegetables until the liquid is reduced at least by half.  Correct the seasoning.  Add some butter and swirl around in sauce.  Pour sauce over sliced duck and serve.

Sunday, January 23, 2011

Wild Foraging


In the winter in southern California you can grow a wonderful assortment of vegetables in the backyard garden.  Cool season vegetables that do well in the winter are lettuce, Swiss chard, spinach, broccoli, cauliflower, cabbage, leeks, green onion, garden peas, endive, escarole and kale.

In the winter I always seem to get out of a garden mood.  I really like the IDEA of a winter garden.  I have yet to actually do one.

Come winter I like to spend my time hiking in the hills. The hills are green and as the rain comes wild edibles and wild flowers begin to appear.  When I am out hiking in the winter if I keep an eye out I might find wild edibles such as wild onion, miner's lettuce, mallow, rose hips, or wild strawberries.

Foraging is fun.  If you are interested in learning more about wild foods I recommend getting a good plant identification guide or taking a class.